What Makes a Monarch Patio Different?
Follow the complete installation process from excavation to the finished patio and discover why proper construction matters.
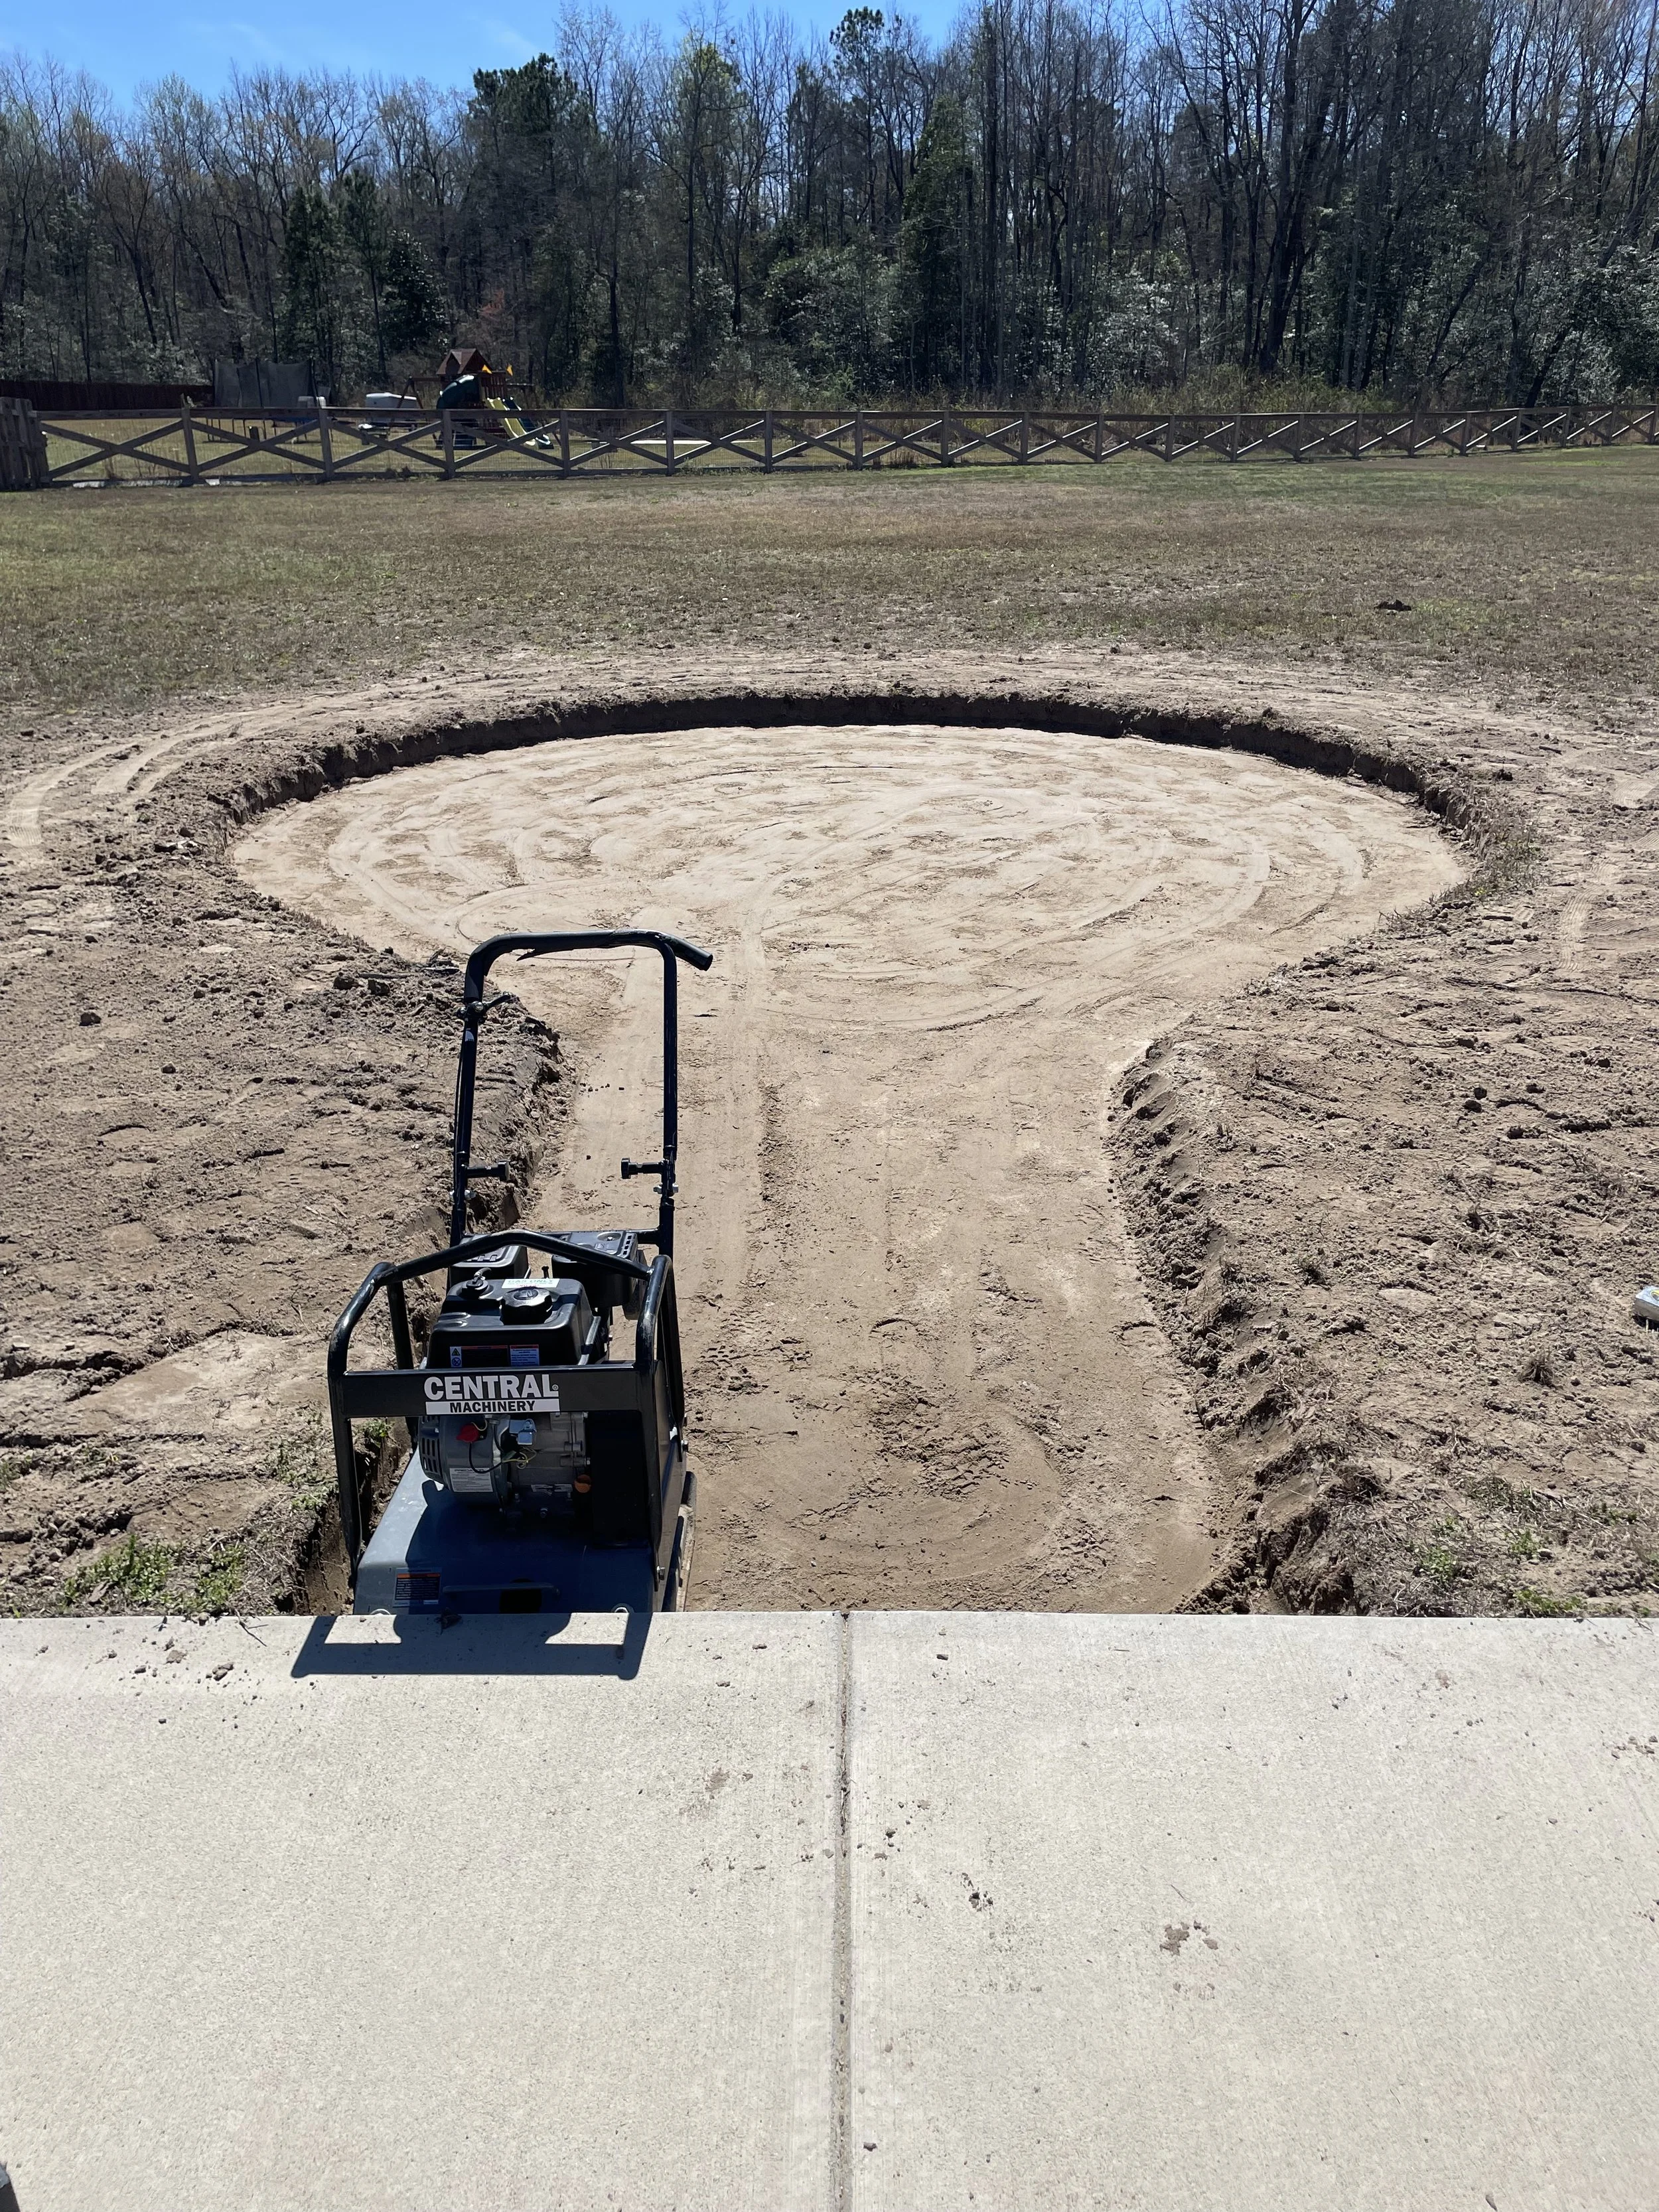
Step 1: Excavation & Subgrade Preparation
Many patio failures begin below the surface. We start by excavating to the proper depth and removing unsuitable material before carefully grading and compacting the subsoil. This creates a stable foundation that helps reduce settling and provides support for the entire patio system.
Proper subgrade preparation is often overlooked, but it is one of the most important factors in building a patio that remains level and performs well for years to come.
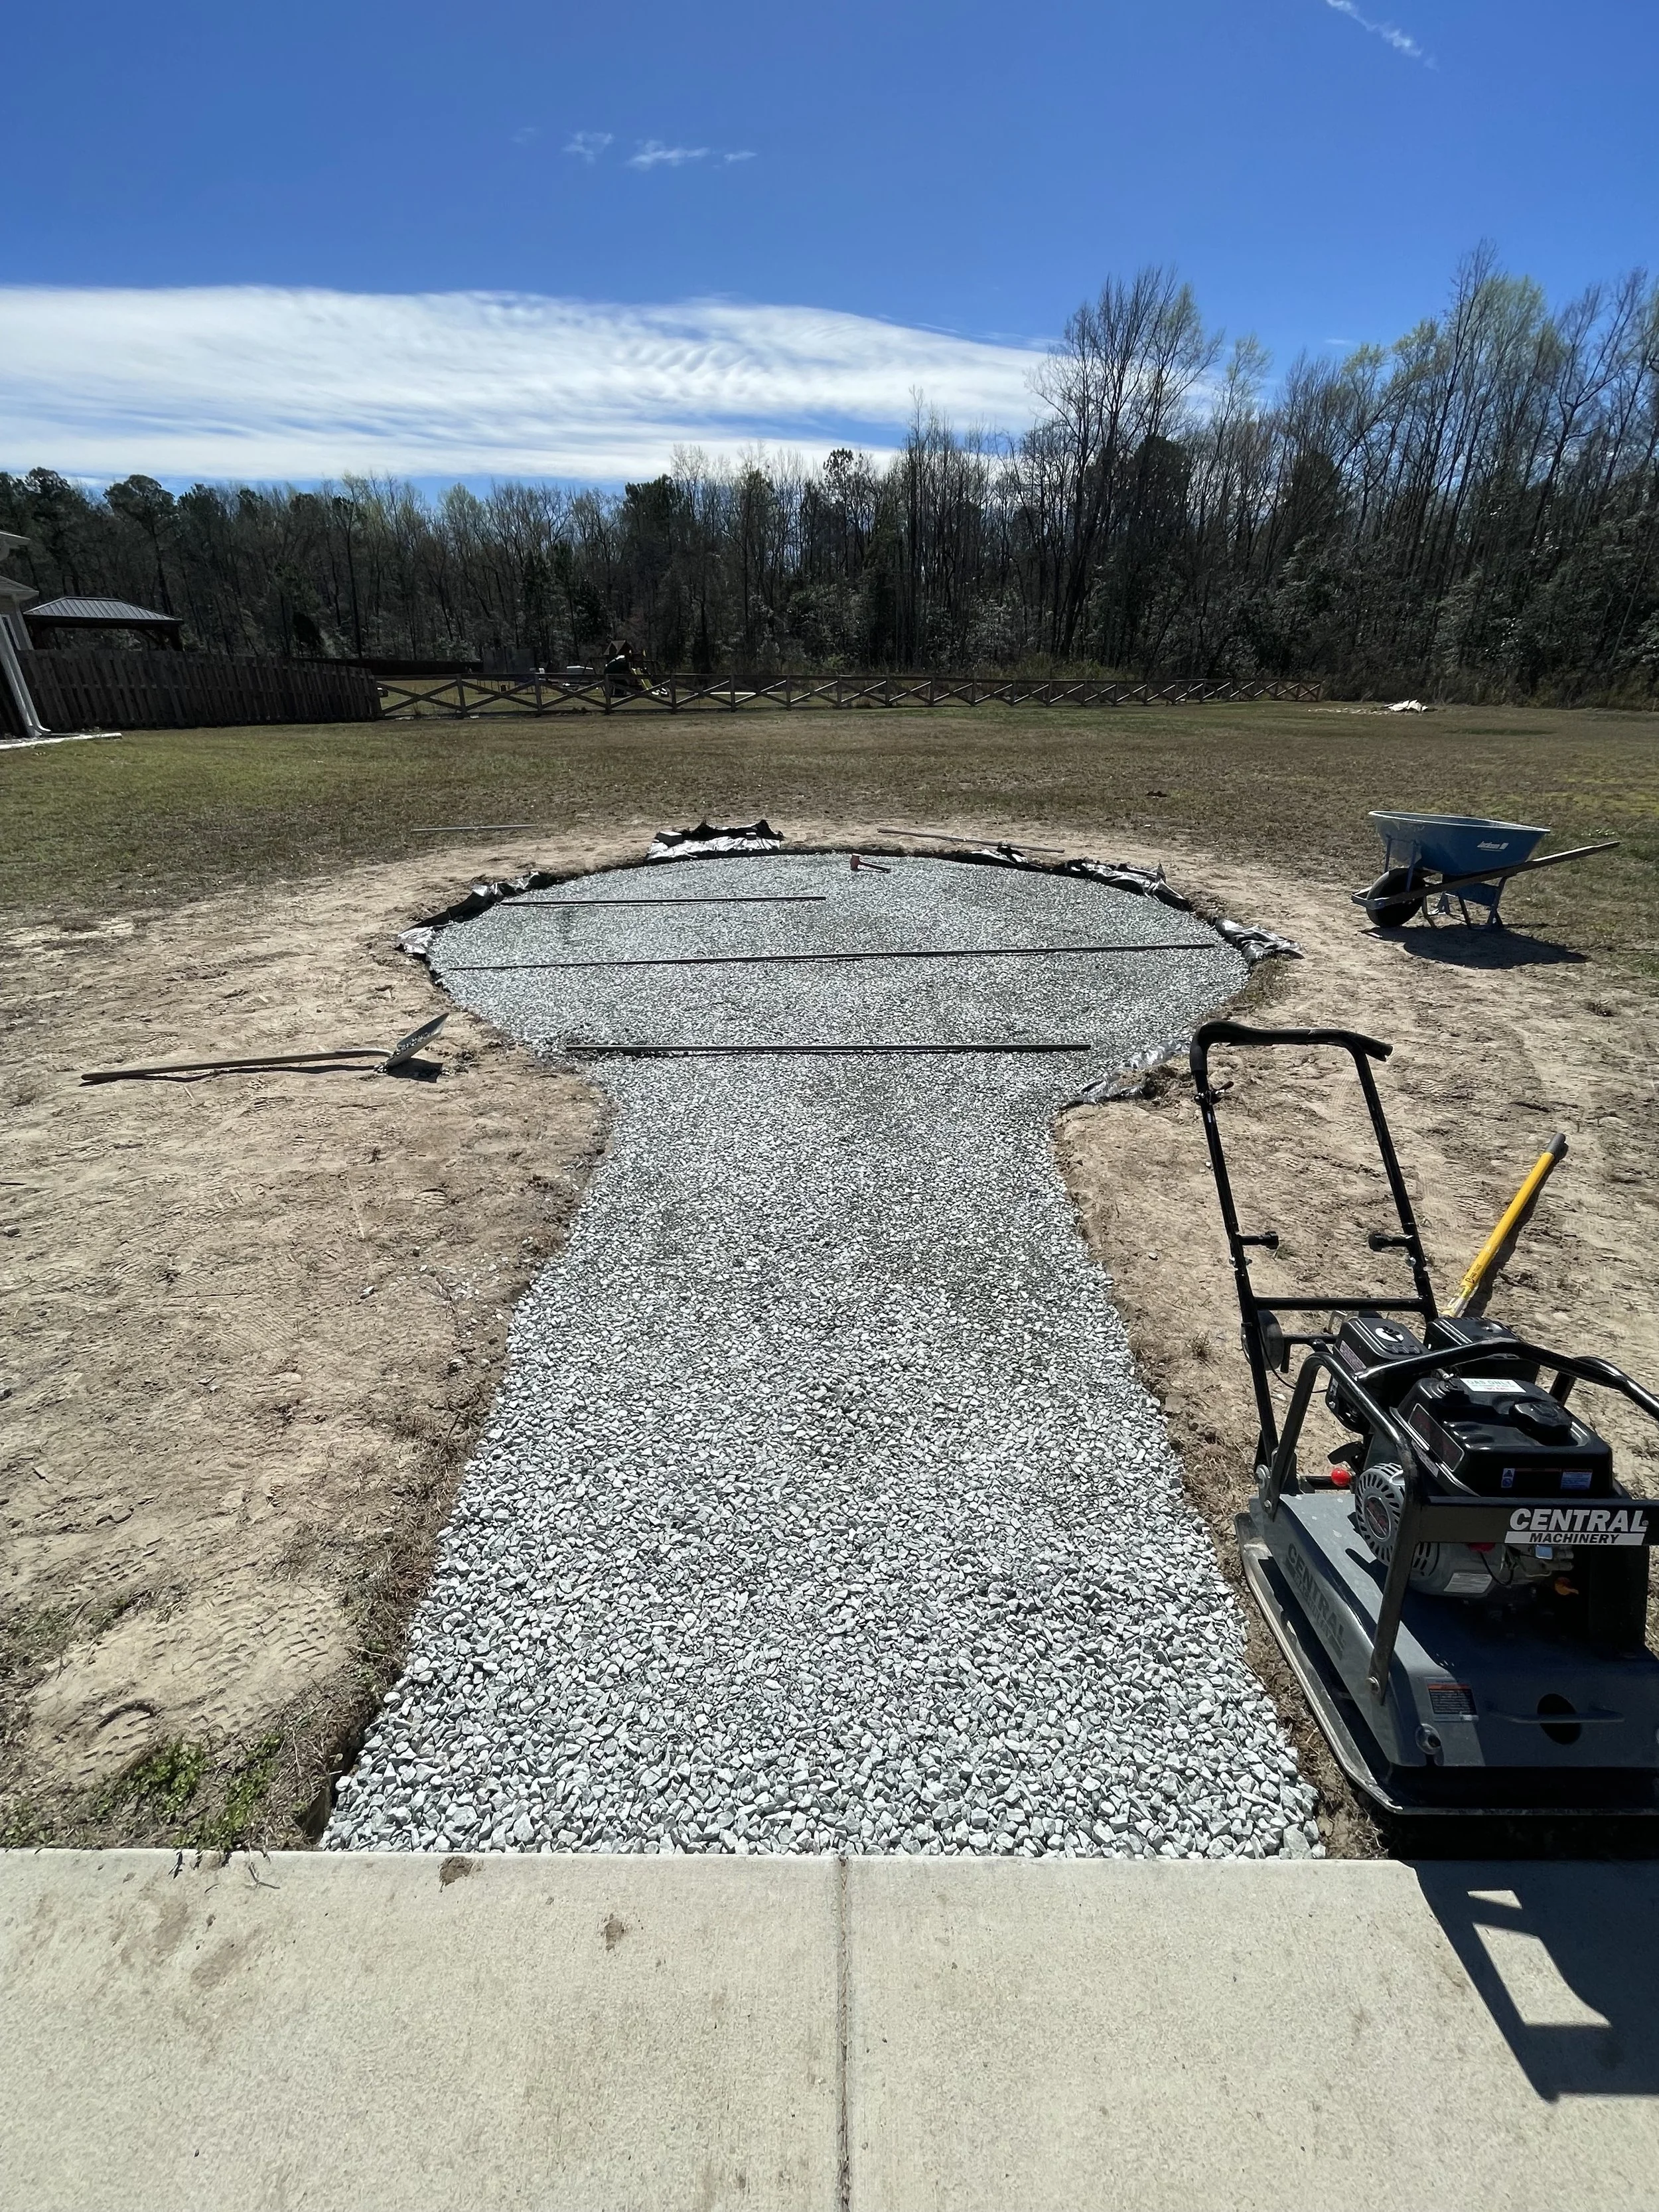
STEP 2: THE FOUNDATION DESIGNED TO PREVENT SETTLING
With the subgrade properly prepared, we install approximately 6 inches of compacted #57 washed stone to create the foundation of the patio.
Unlike traditional base materials, #57 stone locks together when compacted while still allowing water to move freely through the system. This open-graded foundation helps reduce hydrostatic pressure beneath the patio and is specifically designed to minimize future settling.
Because every paver patio is only as strong as the base beneath it, we believe investing extra time and material into the foundation is one of the most important steps in creating a patio that remains level, stable, and beautiful for years to come.
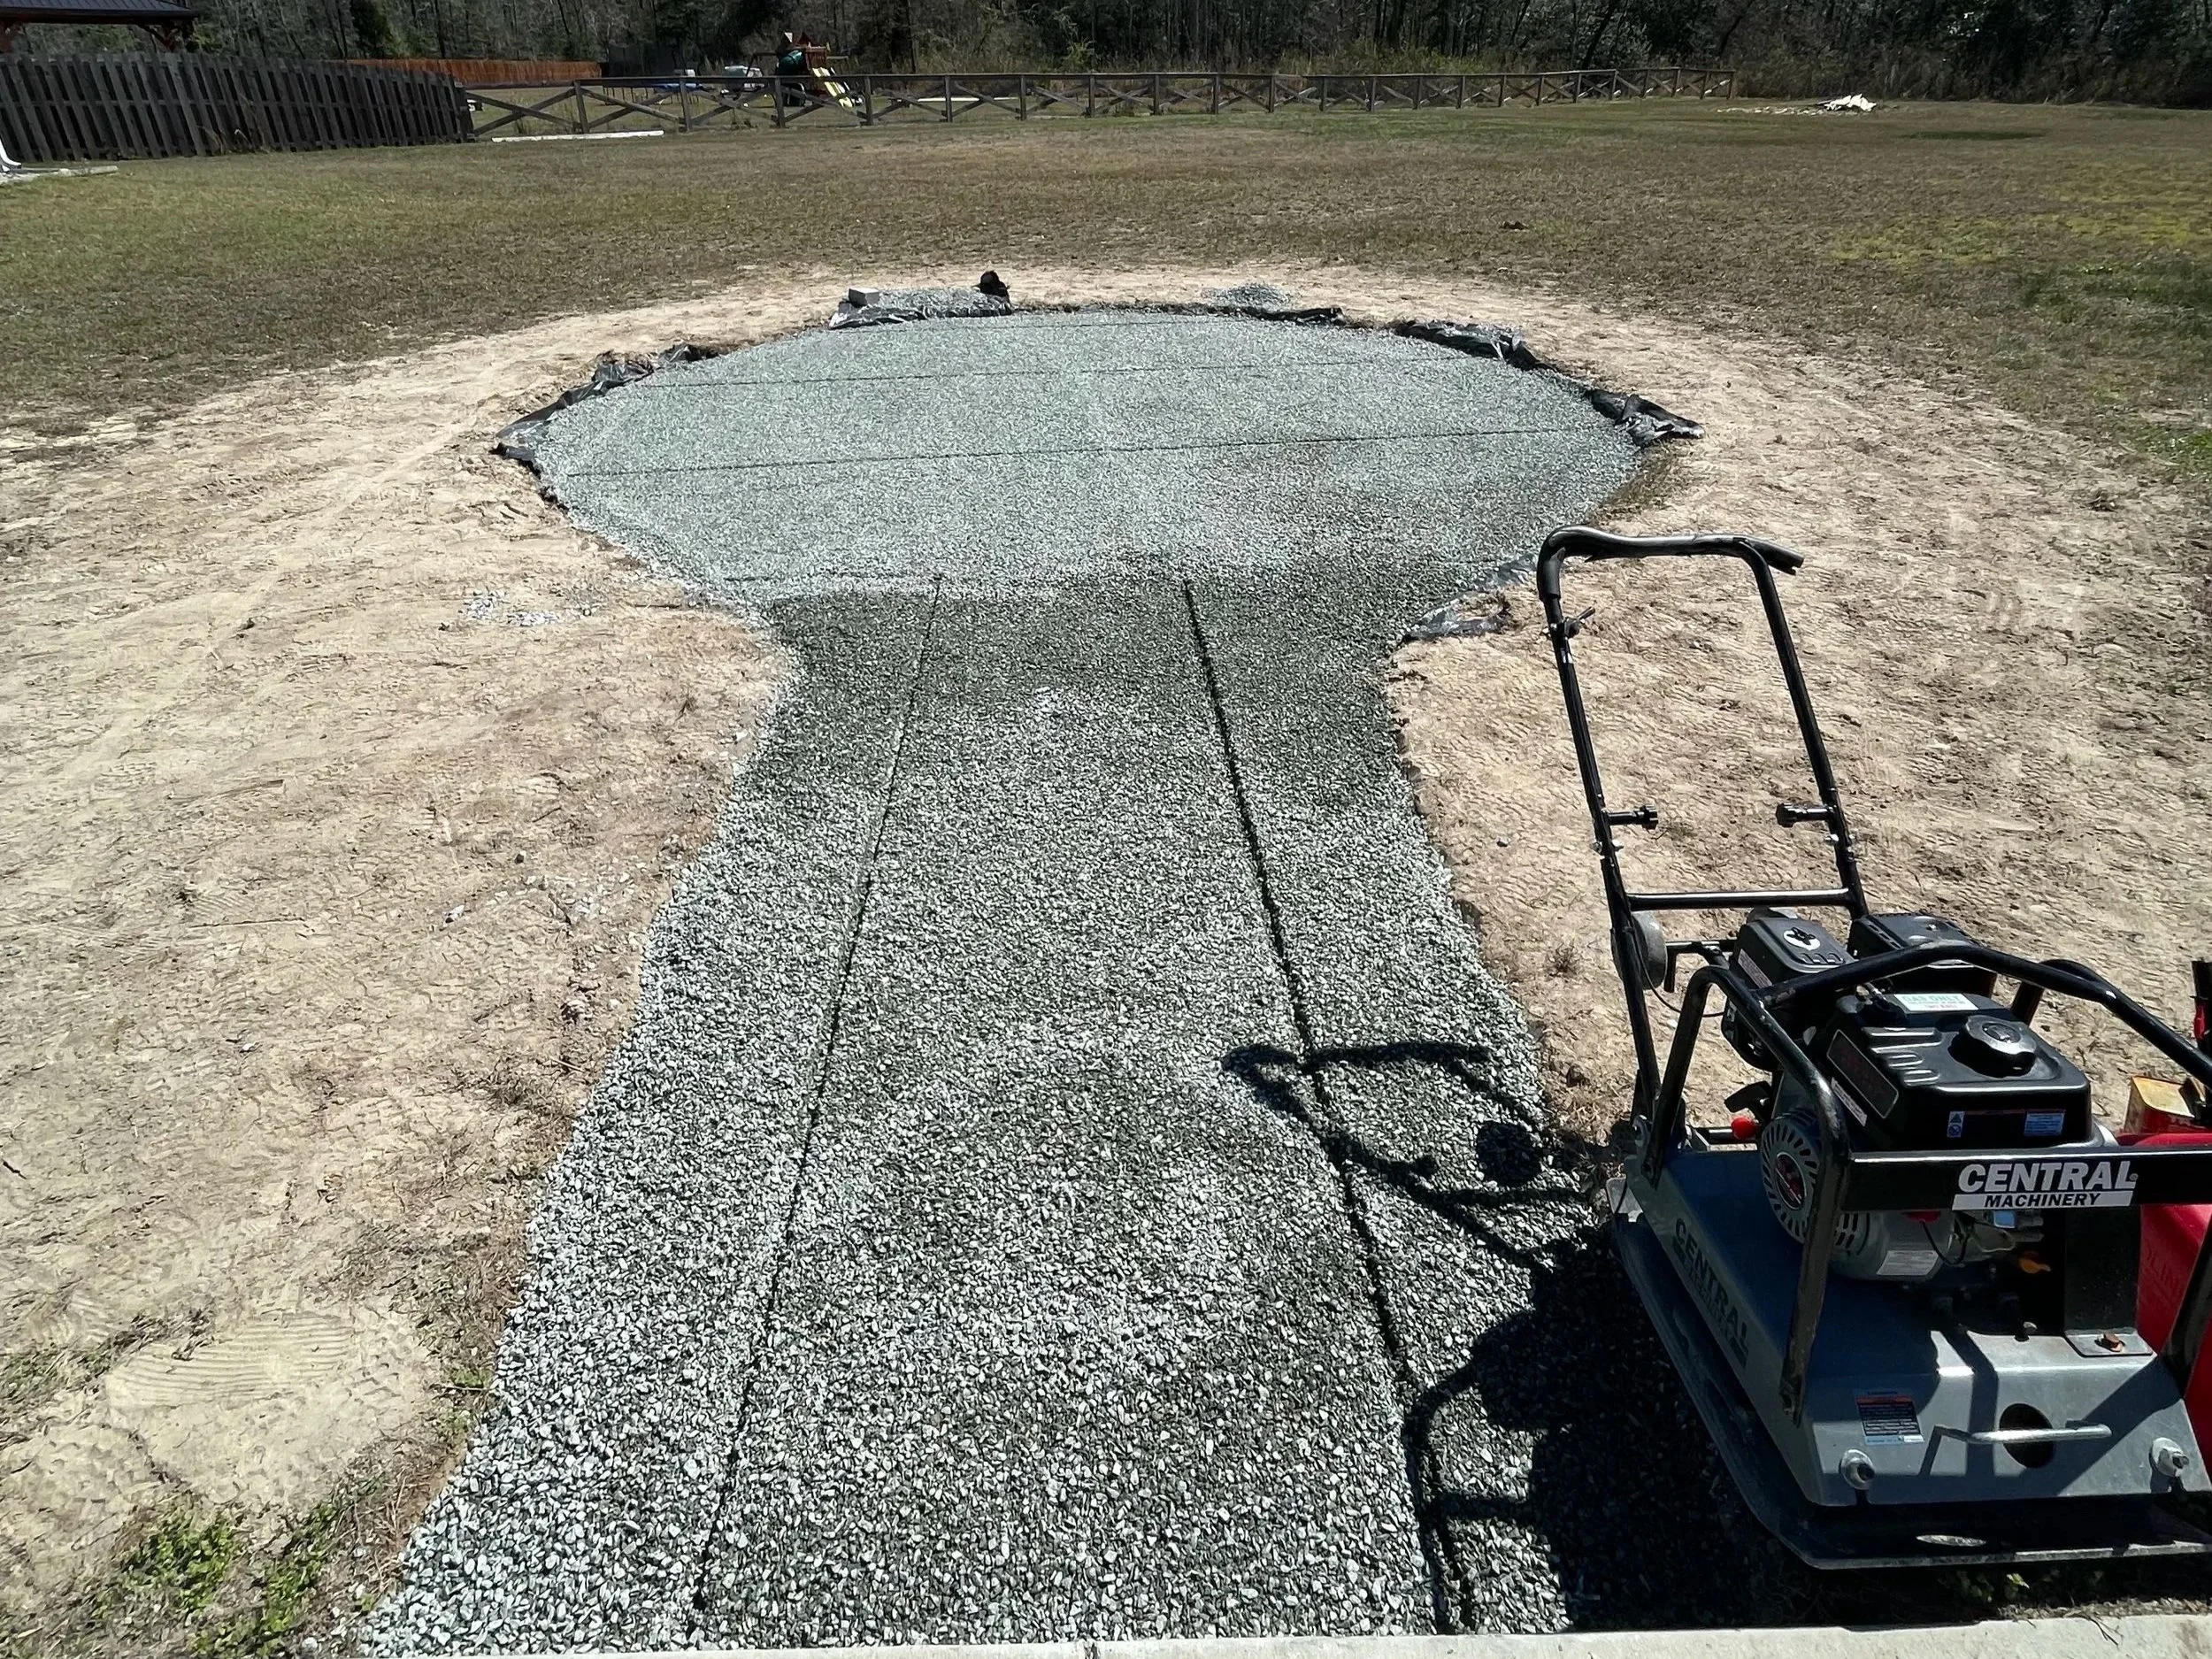
STEP 3: A DRAINAGE SYSTEM INSPIRED BY HISTORY
The concept behind an open-graded foundation isn’t new at all. In fact, some of the world’s longest-lasting roadways were built by the Romans using layers of aggregate stone designed to provide strength, stability, and drainage. Many of those roads remain visible today—a true testament to the importance of a properly constructed foundation.
To continue that same philosophy, we install a layer of #78 chipped stone over our compacted #57 stone foundation. Using screed rails as guides, we carefully create a uniform bedding layer that establishes the final elevations of the patio while maintaining proper drainage throughout the system.
Unlike traditional installations that use sand beneath the pavers, chipped stone allows water to move freely through the patio structure rather than becoming trapped beneath the surface. Sand can retain moisture and may contribute to settlement over time as conditions change beneath the patio.
The result is a stronger, better-draining installation designed to provide long-term stability while creating the clean, professional appearance homeowners expect from a premium paver patio.
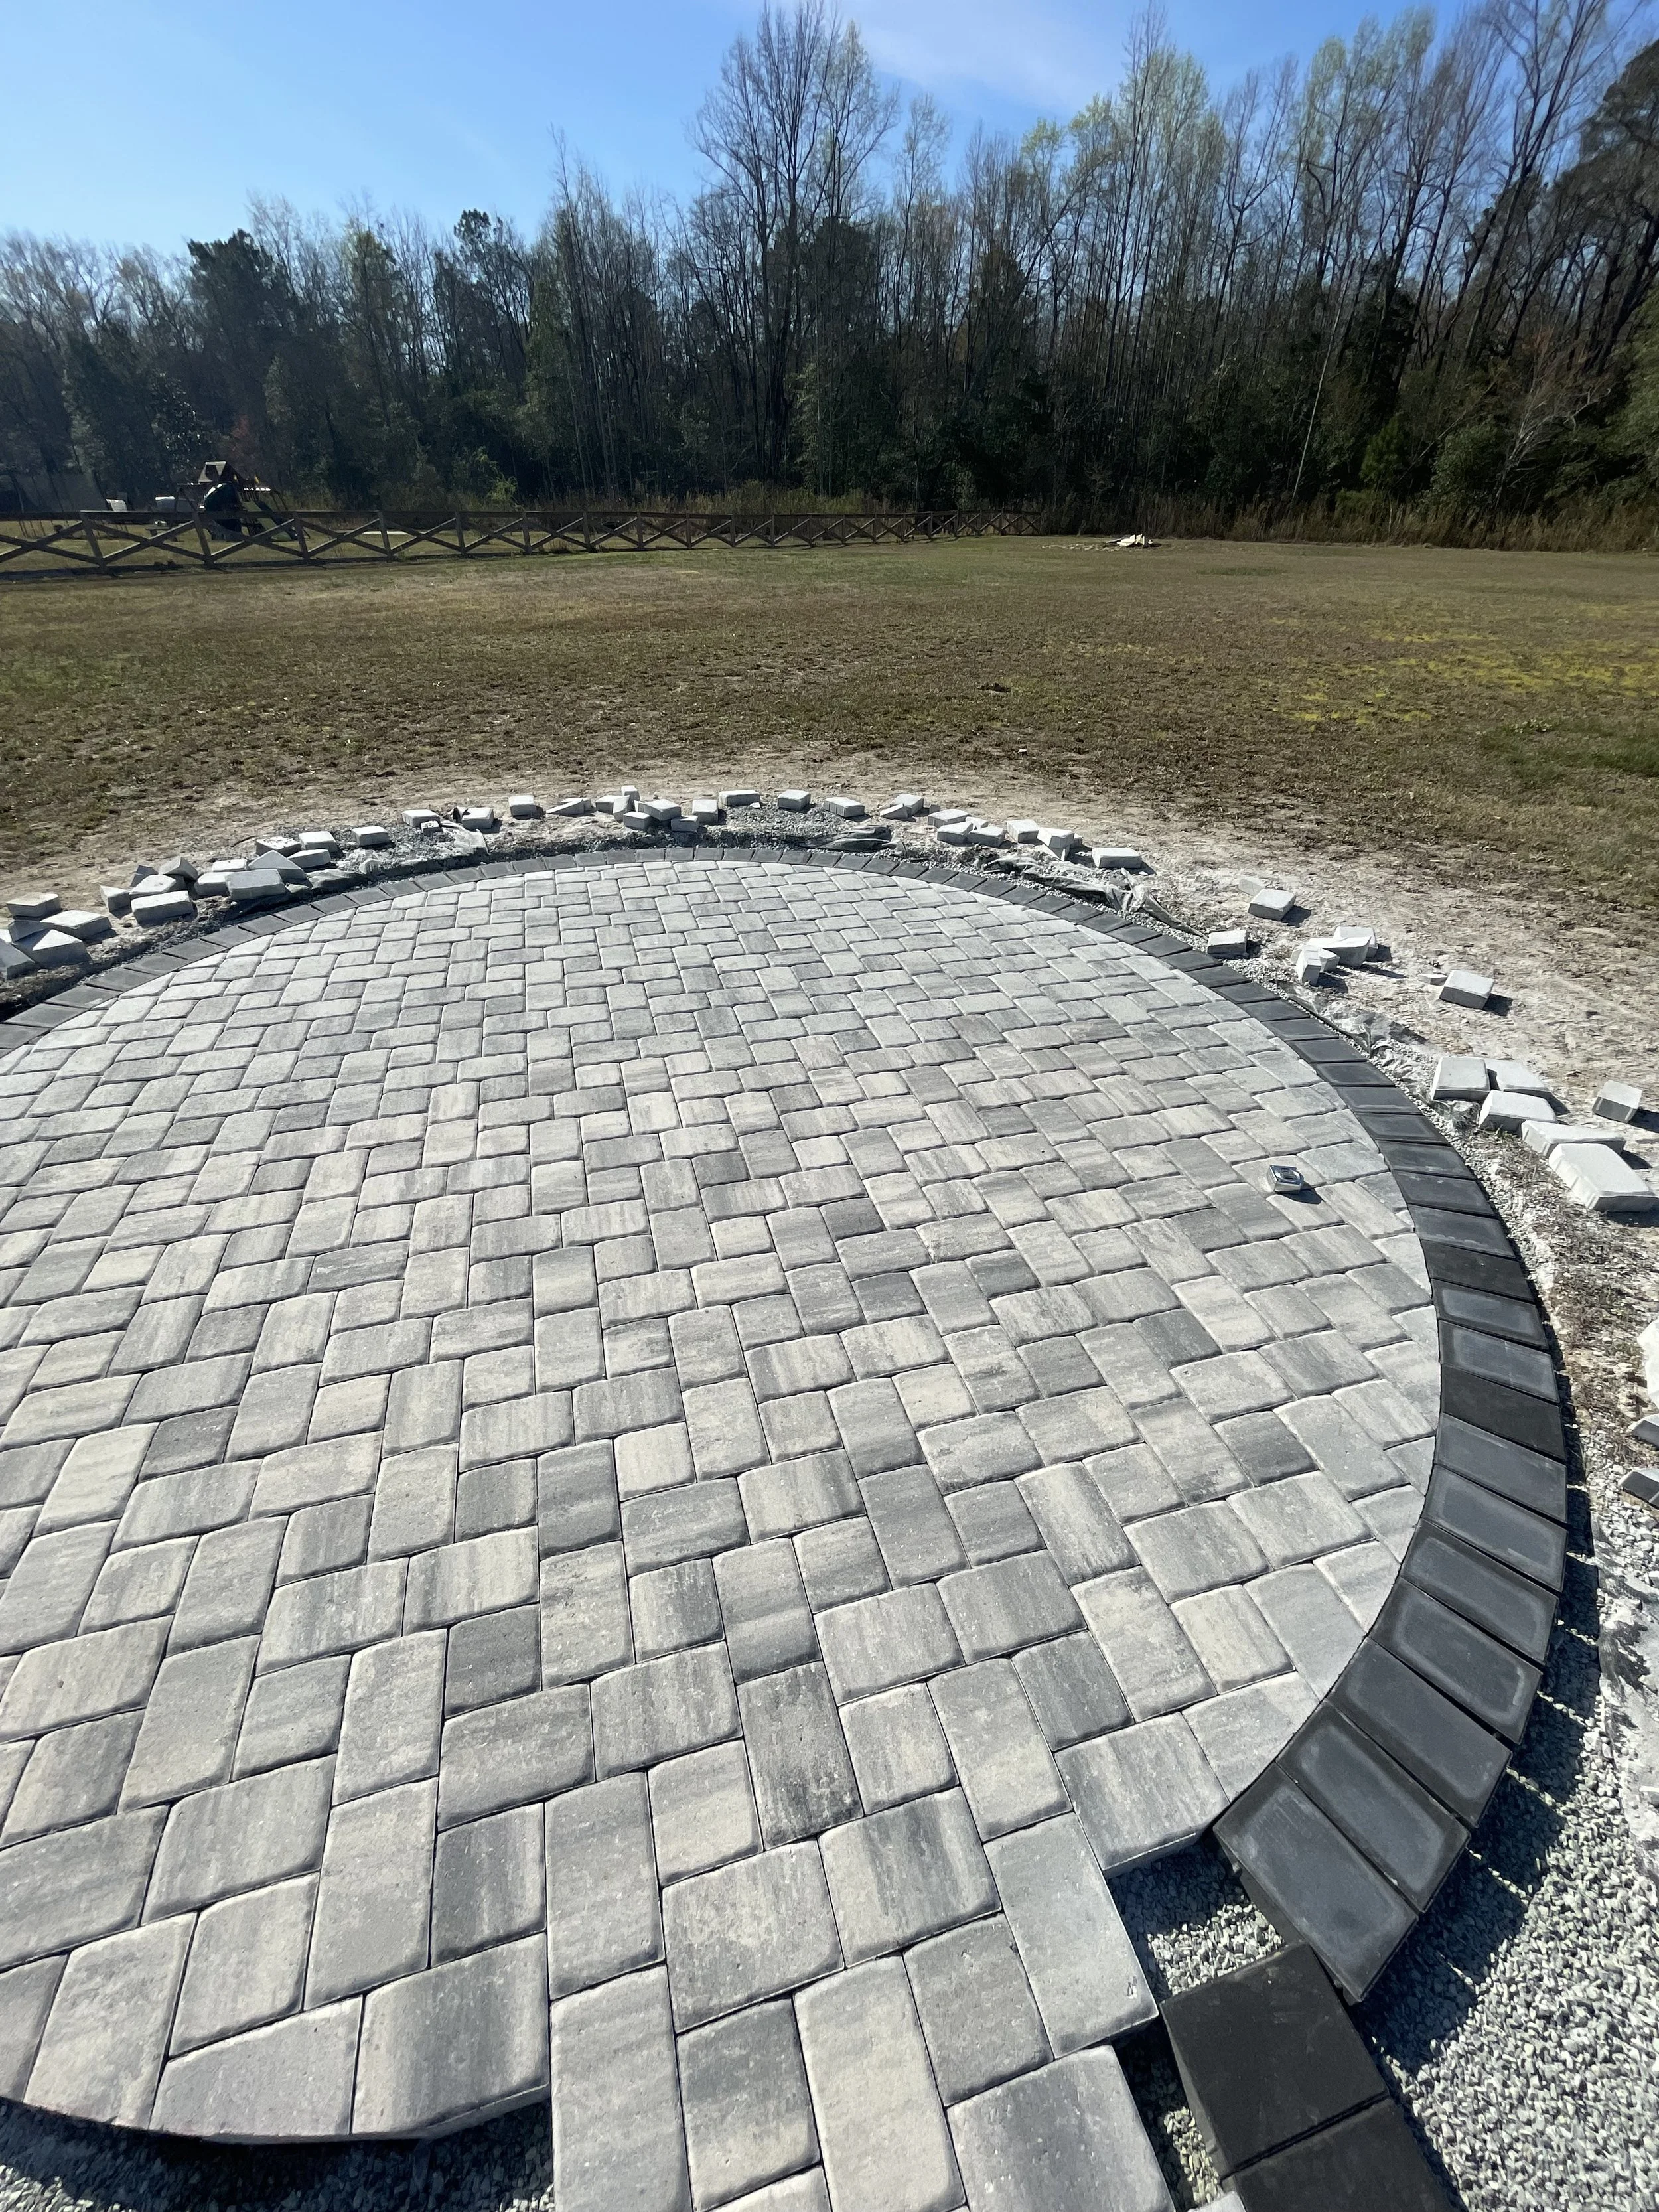
STEP 4: WATCHING THE PATIO COME TO LIFE
With the foundation and bedding layers complete, it’s finally time for the transformation homeowners have been waiting for.
Each paver is carefully placed on the #78 chipped stone bedding layer according to the selected pattern and design. This is often the most satisfying stage of the entire project, as the patio begins to take shape and the vision starts becoming reality. What was once an excavated area of the yard now starts to resemble a finished outdoor living space.
As the installation progresses, any necessary cuts are made using a professional concrete saw equipped with a diamond blade. This allows us to create clean edges, smooth curves, and precise fits around borders, fire pits, walkways, and other design features.
Attention to detail during this stage ensures consistent joint spacing, clean lines, and a finished patio that looks as beautiful up close as it does from across the yard.
STEP 5: LOCKING EVERYTHING INTO PLACE
By this stage, every paver has been installed, every curve has been cut, and every gap has been carefully filled like pieces of a puzzle. With the patio fully assembled, it’s time to secure everything in place.
To prevent movement along the perimeter, we install a polymer-infused concrete edge support system around the patio. While many contractors rely on plastic edging that can flex, warp, or shift over time—or aluminum restraints that may bend under pressure—we utilize a concrete edge support designed to create a rigid border around the patio. The added polymers help strengthen the edge while providing additional durability against the elements.
Once the edge support has cured, polymeric sand is swept into every joint between the pavers. Initially, the material behaves like a fine sand, allowing it to fill the spaces between each stone. After activation with water, special polymer binders are triggered, causing the material to harden and lock the pavers together.
Unlike traditional concrete, polymeric sand retains a degree of flexibility. While concrete can crack when subjected to slight movement, polymeric sand is designed to accommodate minor expansion, contraction, and movement within the pavement system. This flexibility helps reduce joint failure while still providing excellent resistance against washout, weed growth, and insect intrusion.
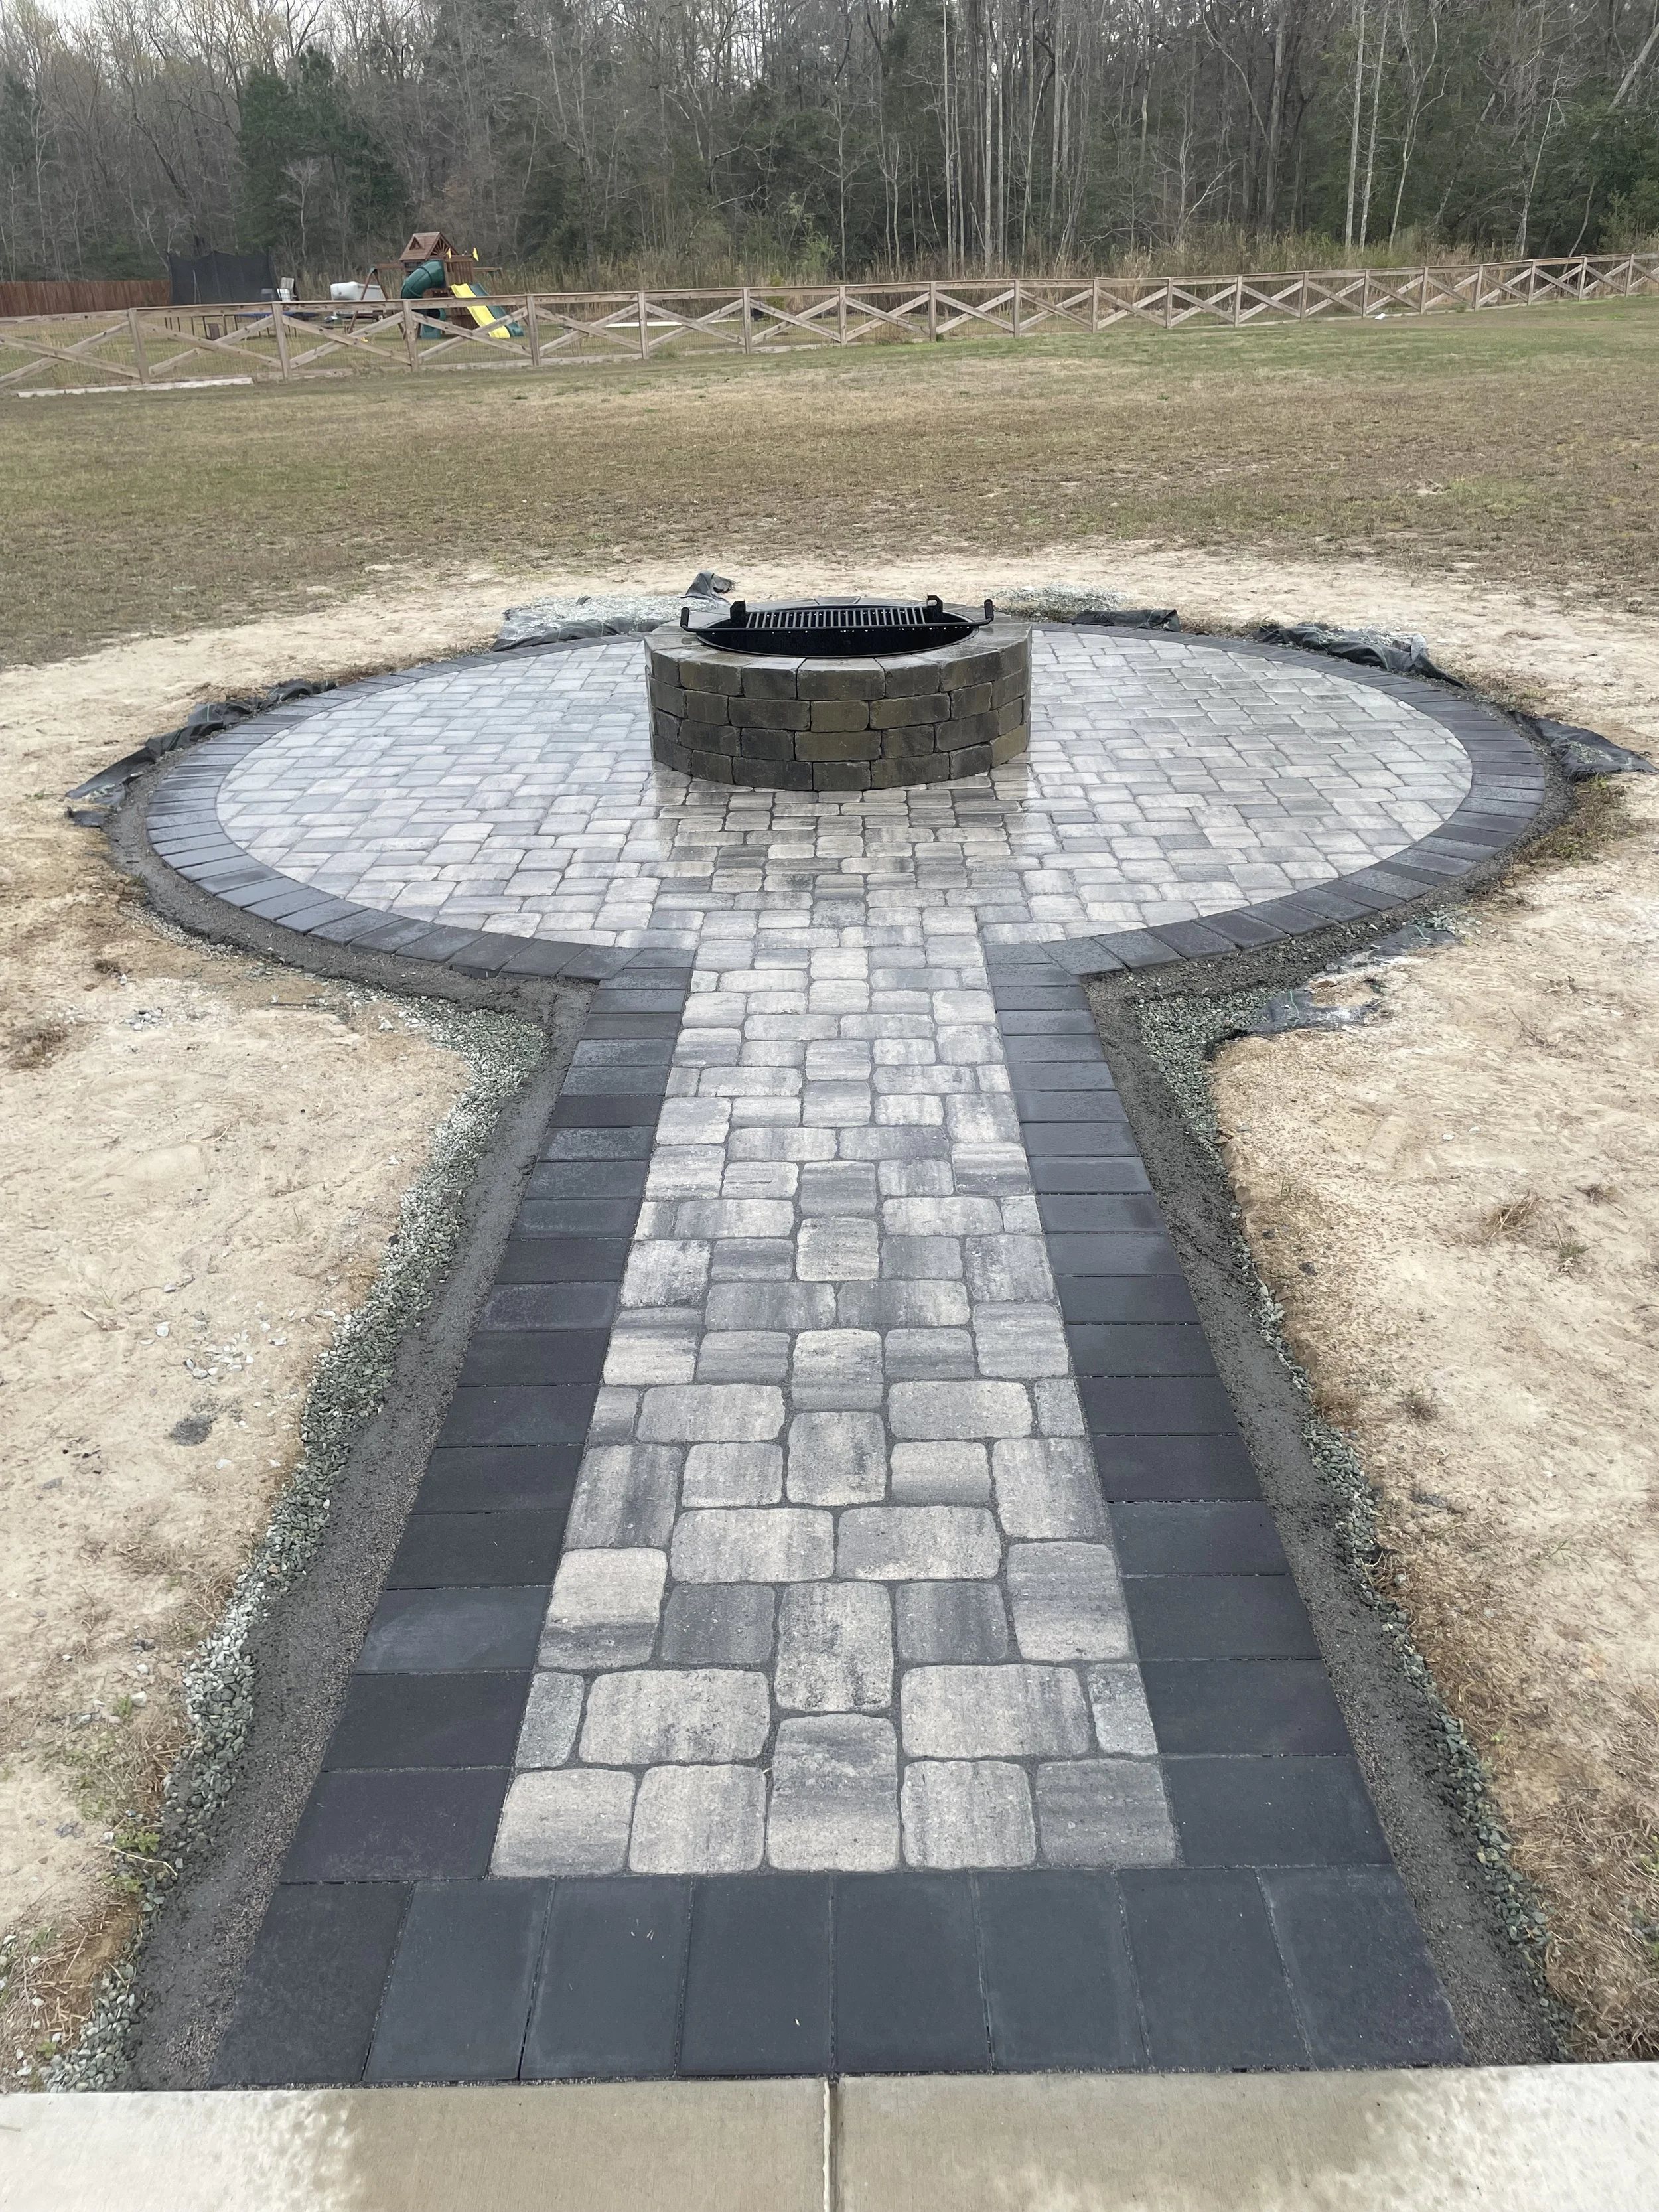
The Finished Product
Built to Last. Designed to Enjoy.
